
Inflatable Kayak Pumps
Everything You Need To Know
Inflatable kayak pumps have a pretty simple job, getting your kayak inflated and ready to go. But some pumps make that job a lot easier than others. The quicker and easier the setup, the less effort it feels like to get out on the water. And when there’s less fuss involved, you’re much more likely to use your kayak regularly and enjoy it more.
In this section we will take you through various pumps, starting with the most basic pumps and working through to the easiest set-and-forget rechargeable electric pumps. We’ll also explain pump fittings and valve compatibility, so you know what to look for when choosing a pump for your kayak.
Basic Bellows Pumps
Inflatable kayak packages sometimes include a basic bellows-style foot pump. They do the job, but they can make inflation feel like much more work than it needs to be.
These pumps are often made from fairly lightweight plastics, so they can wear out with regular use. They’re also single-action, meaning they only push air into the kayak when you press down. When you lift your foot, the bellows simply refill with air ready for the next stroke.
The bellows themselves don’t hold a huge volume of air, so each push delivers a relatively small amount. Combine that with the narrow hoses commonly used on these pumps, which can create a surprising amount of resistance, and inflation can become a slow and fairly tiring process.
They’re also generally better suited to lower-pressure chambers. As the pressure starts to build inside the kayak, the pump becomes noticeably harder to use, which can make reaching the recommended pressure more difficult.
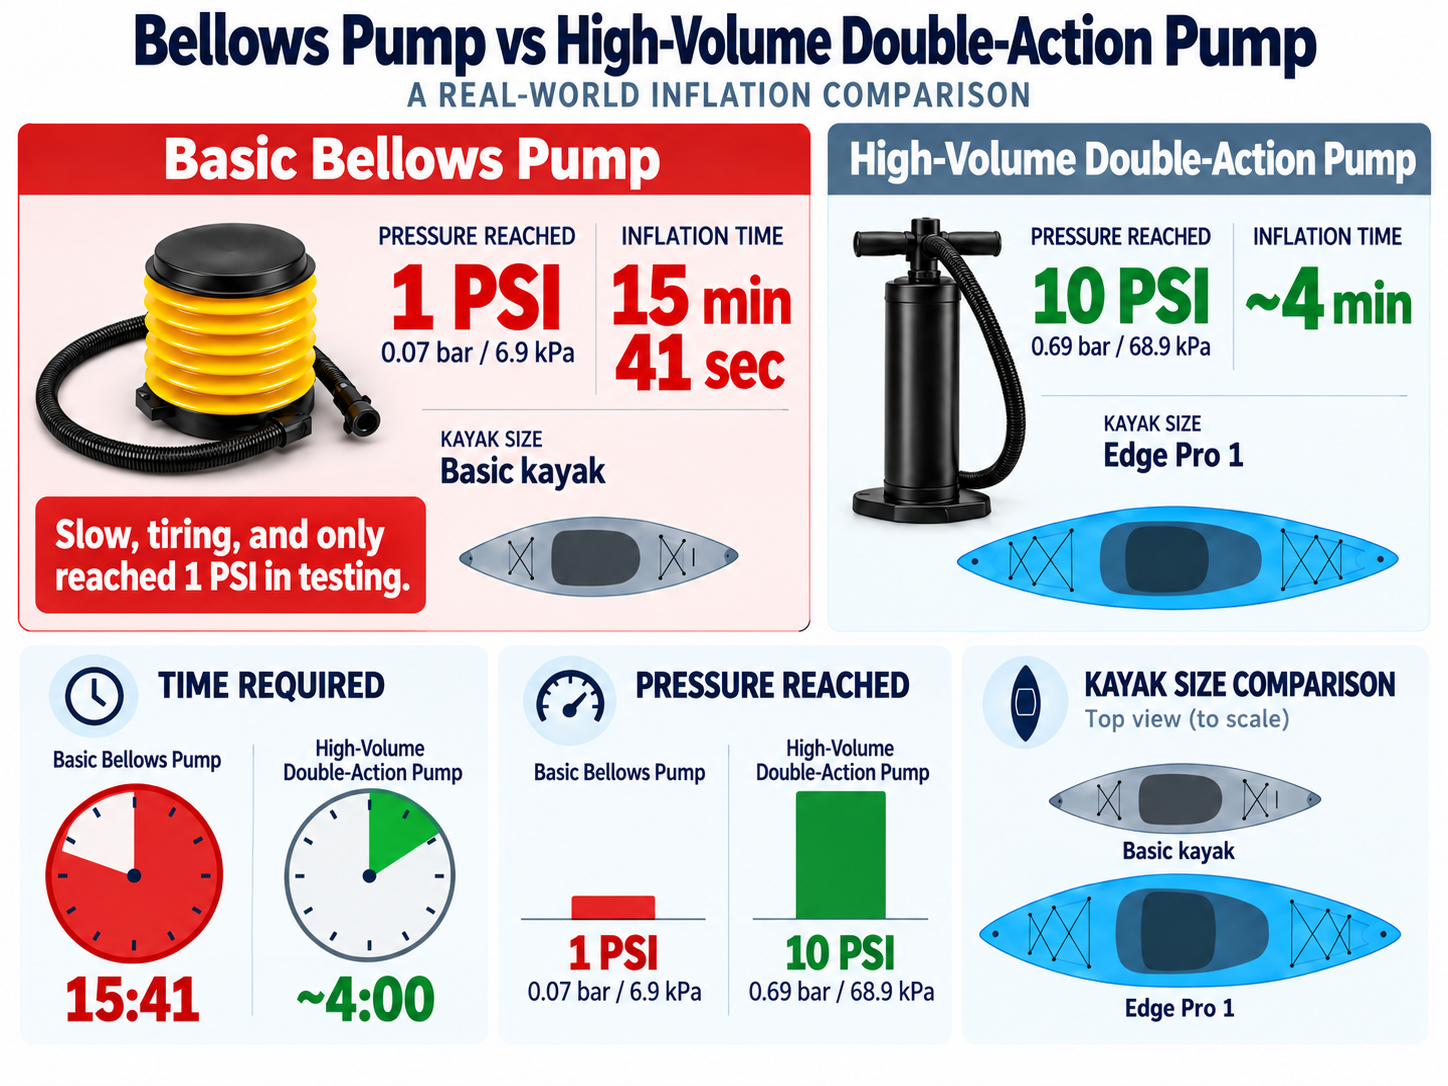
Our testing showed just how big that difference can be. Inflating a basic kayak to only 1 PSI with a bellows pump took 15 minutes and 41 seconds. Using a high-volume double-action pump, we inflated our Edge Pro 1, a kayak, all the way to 10 PSI in around 4 minutes. In other words the kayak reached 10 times the pressure in about a quarter of the time.
They’ll get your kayak inflated, but if every trip starts with a long, tiring pumping session, it can quickly become one of those little things that makes you think twice about going for a paddle.
High Volume Manual Pumps
High-volume manual pumps are one of the most common options for inflatable kayaks, and for good reason.
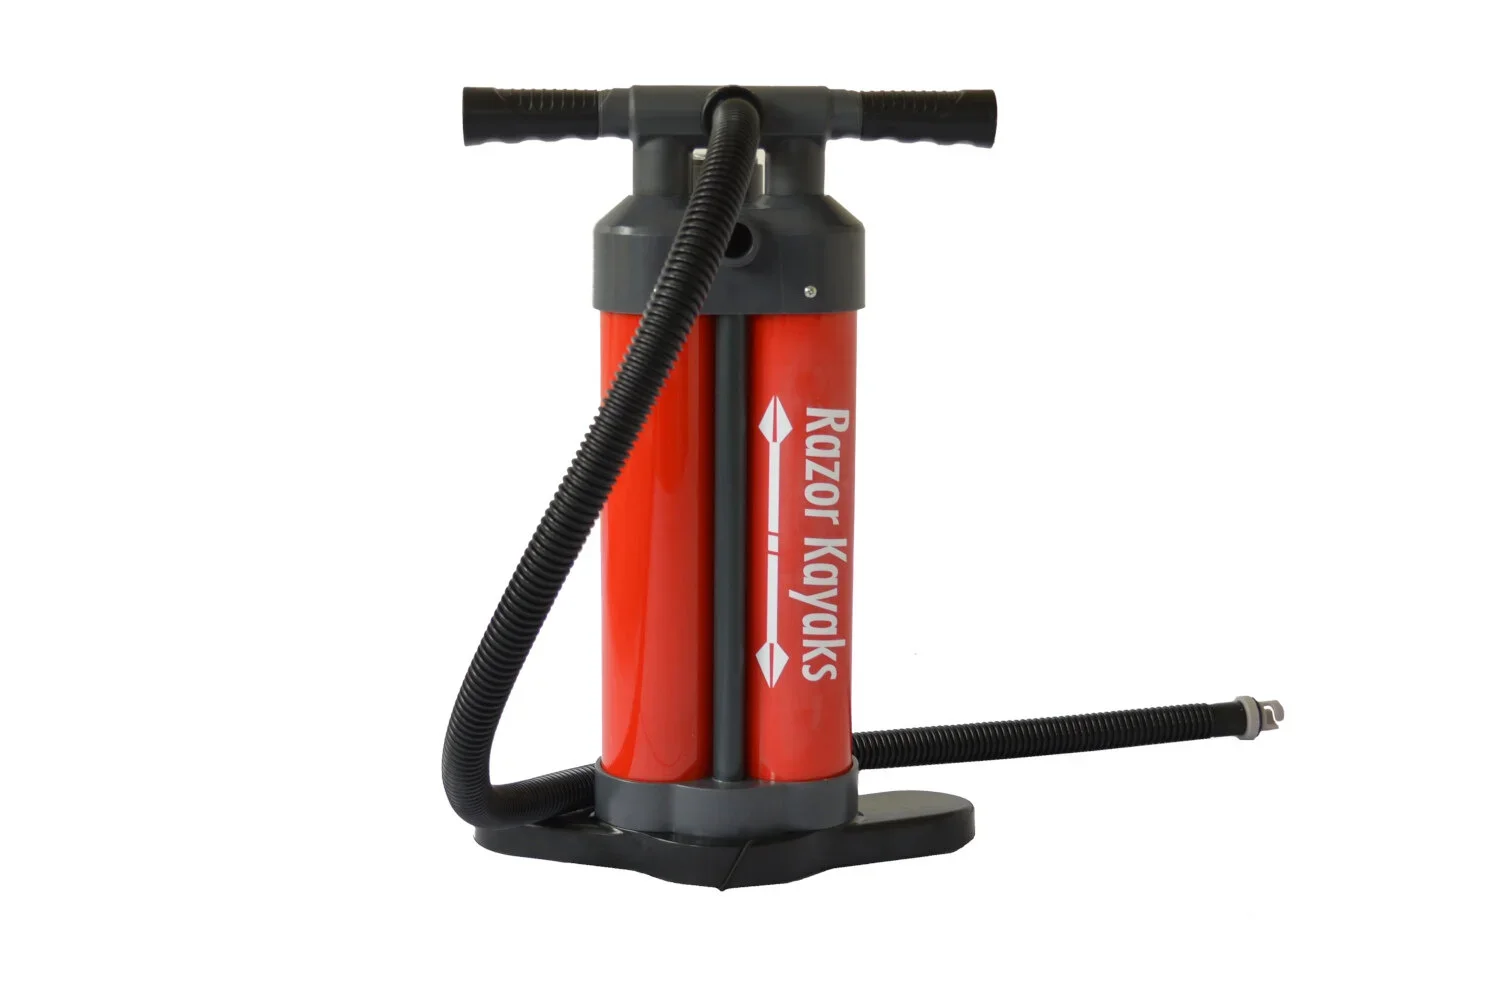
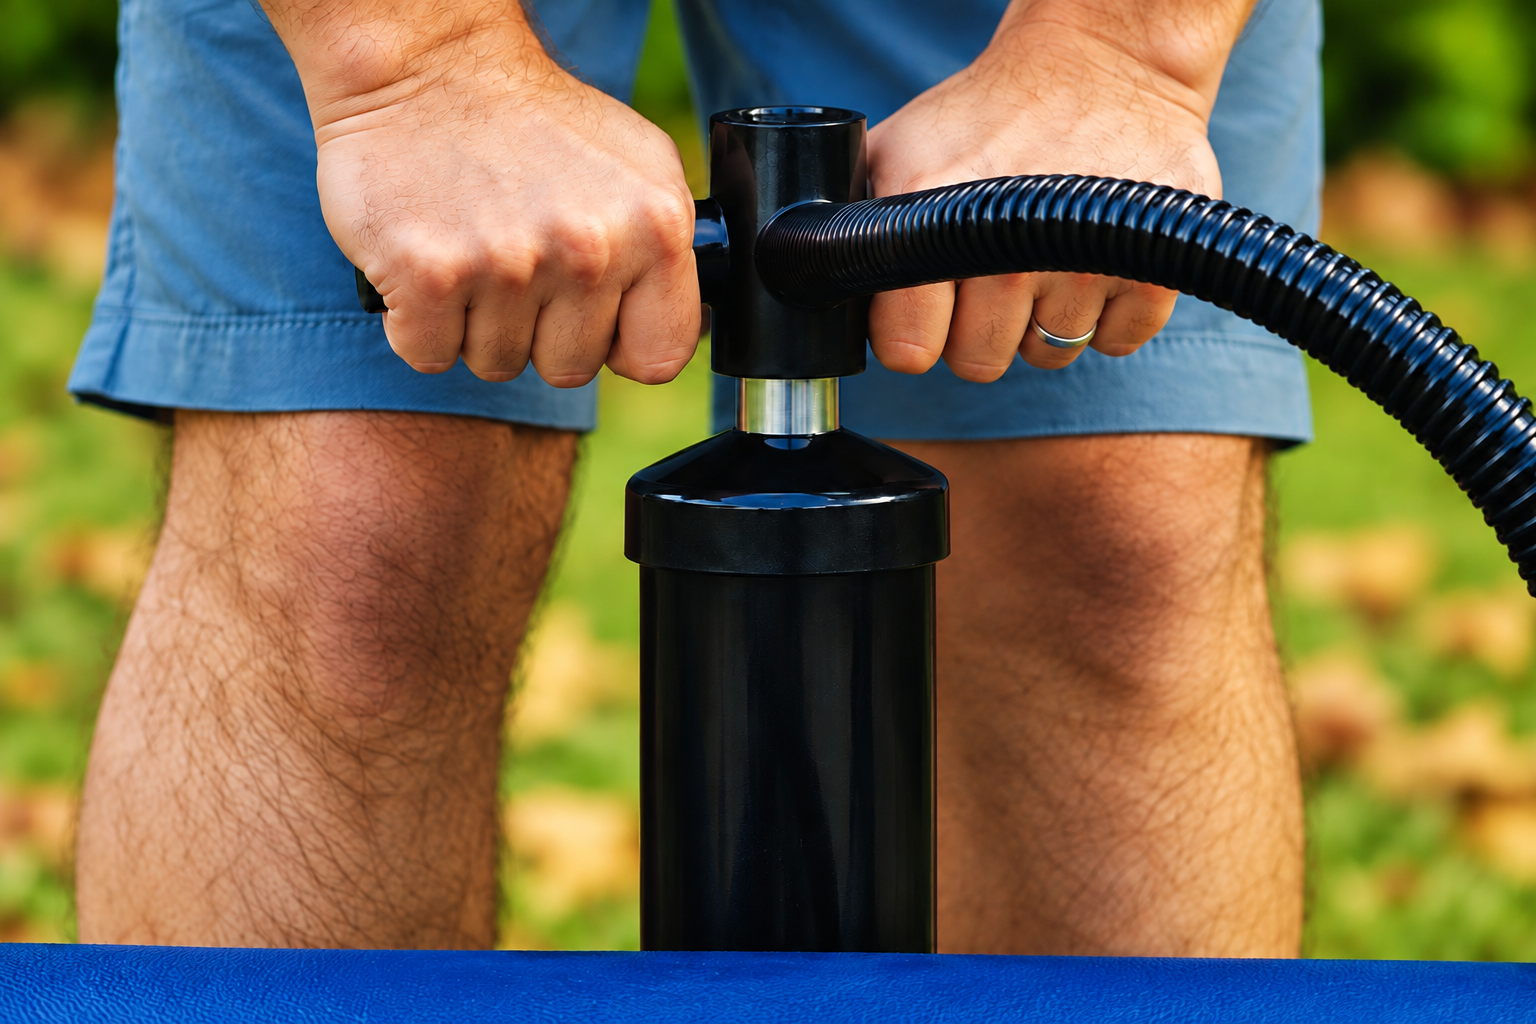
Each stroke moves a large volume of air through a wide-diameter hose, which means less resistance and much faster inflation. With a bit of physical effort, a good high-volume manual pump can often inflate a kayak just as quickly as, or even faster than, some electric pumps.
The quality of these pumps is generally a big step up from basic bellows pumps too. Better seals, stronger plastics and metal components make them more durable and much more efficient to use.
Many high-volume pumps are double-action, pushing air into the kayak on both the upstroke and downstroke. As the pressure builds, they can be changed from high-volume mode to high-pressure mode, making it much easier to get those final few PSI into the kayak.
This is particularly important with higher-performance inflatable kayaks, where getting the kayak to the correct pressure makes a noticeable difference. The right PSI helps the kayak achieve the stiffness and shape it was designed for, which ultimately gives you better performance on the water.
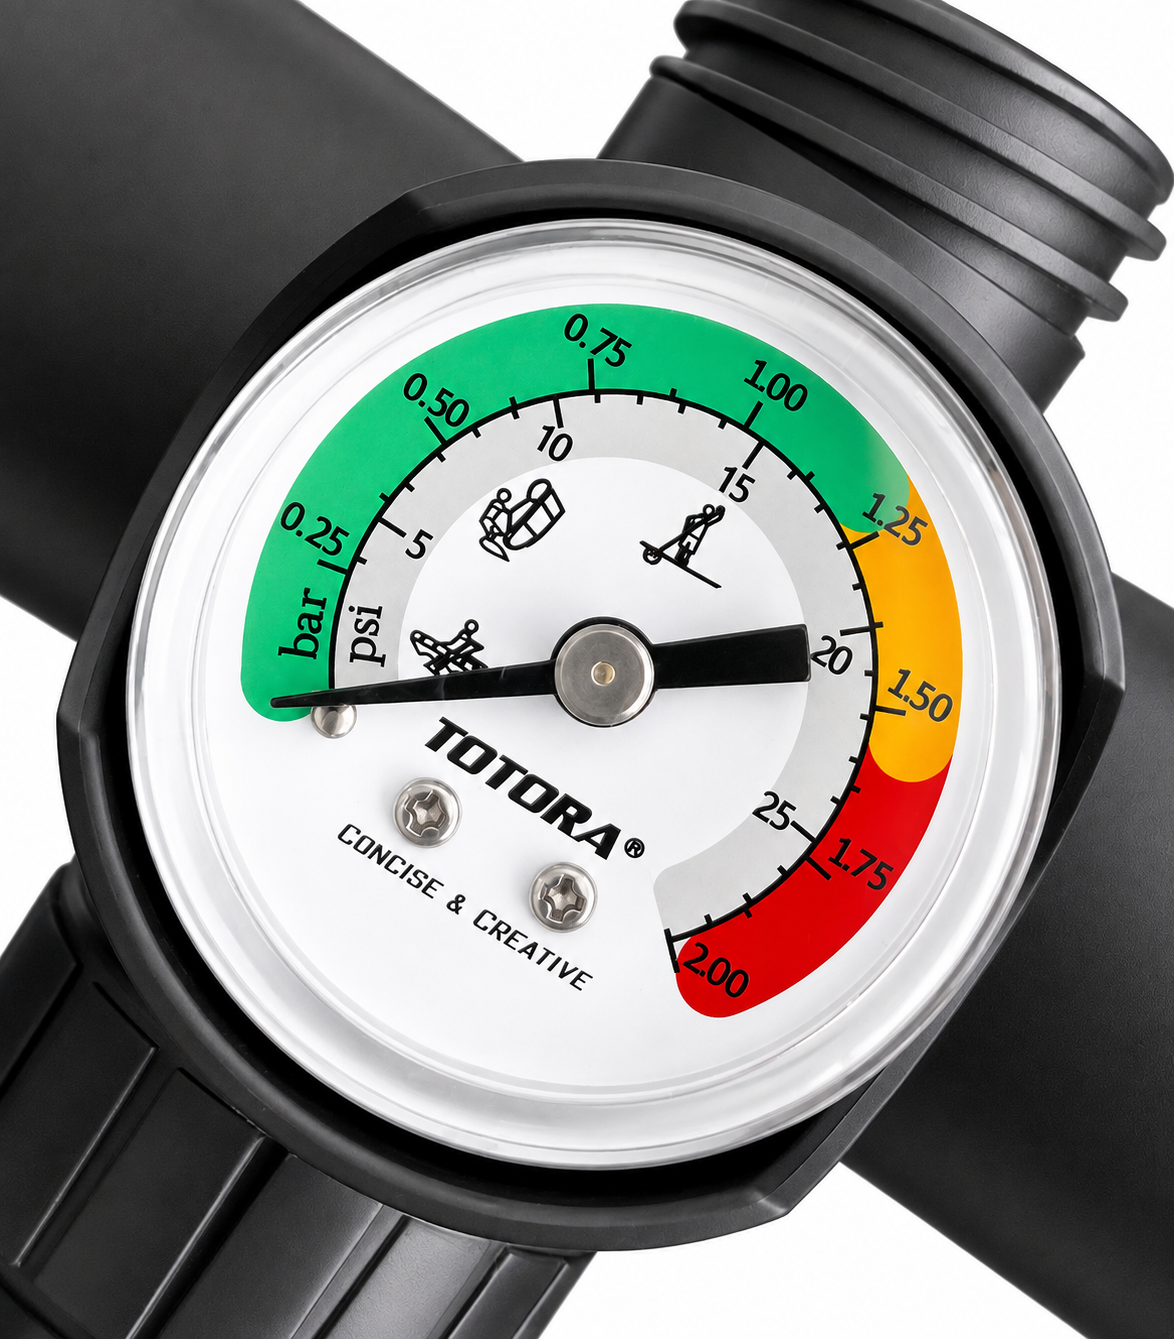
A good quality pressure gauge is an important part of this too, allowing you to inflate the kayak accurately rather than simply guessing when it feels firm enough.
A good manual pump makes setting up quicker, easier and far less of a chore. And just like everything else with an inflatable kayak, the easier it is to get on the water, the more likely you are to use it regularly.
Electric Pumps
Electric pumps are sometimes seen as a luxury, or even the lazy option. But that really misses the point. What a good electric pump actually gives you is time.
Most quality electric pumps allow you to set the required pressure and then automatically stop once they reach it. They also have a digital gauge showing the pressure in real time, so you can see the kayak progressing towards the correct PSI as it inflates. This is particularly useful with higher-performance inflatable kayaks, where reaching the correct pressure is important for stiffness, shape and performance on the water.
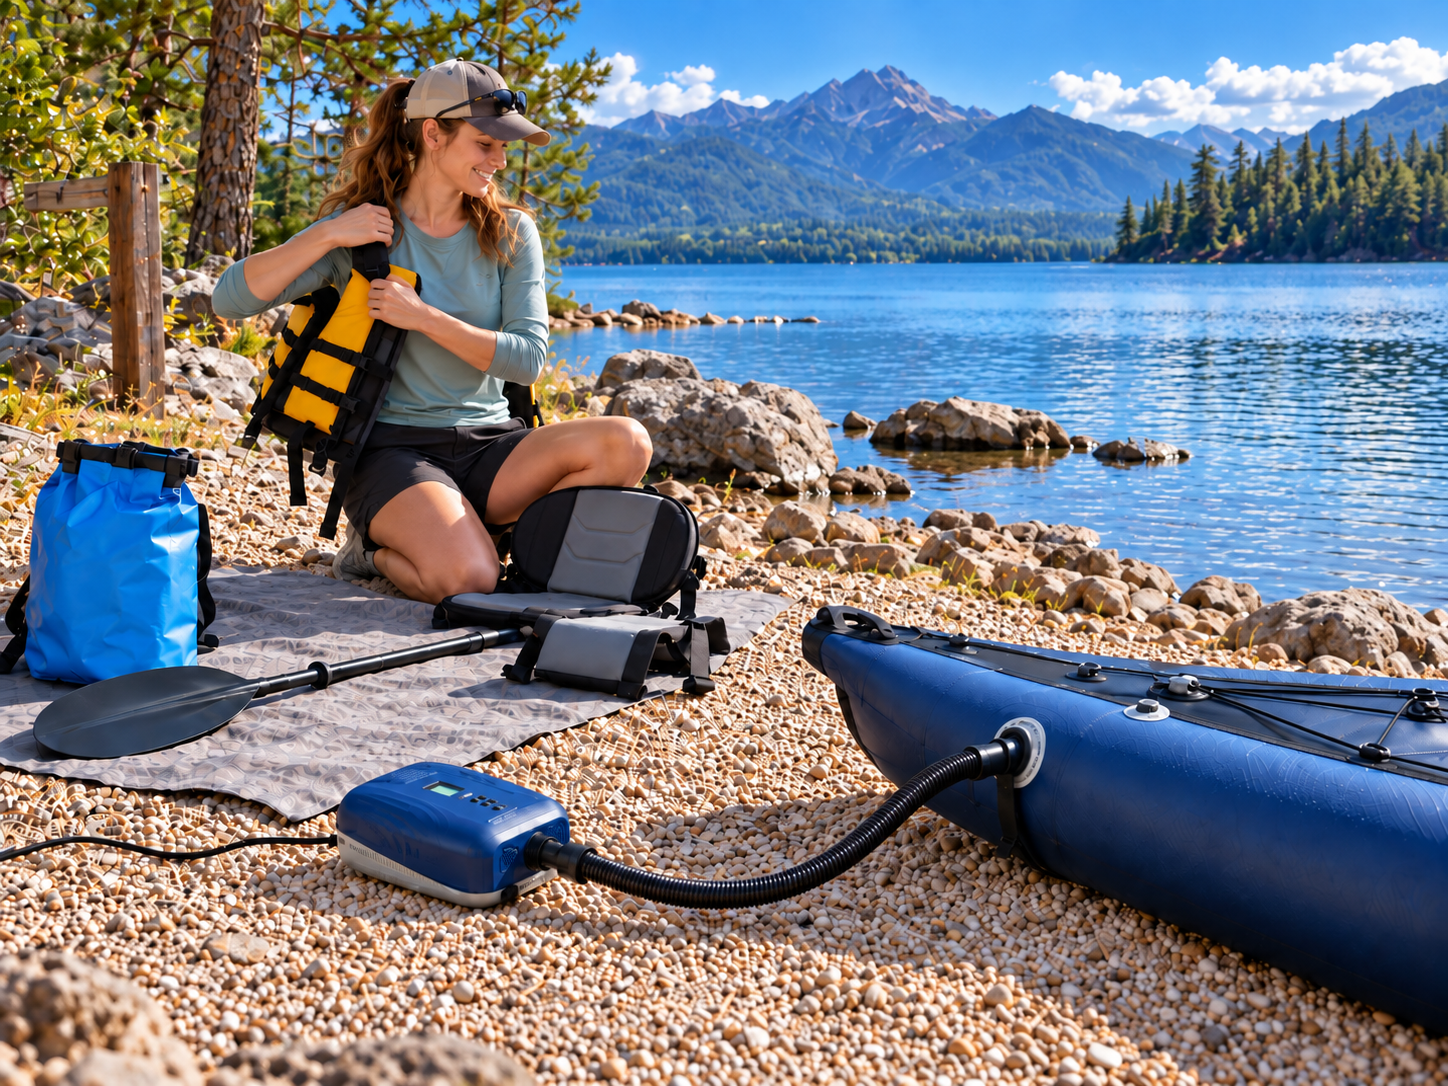
The automatic shut-off also means you’re not standing there pumping while everything else waits. While the kayak is inflating, you can fit the seat and footrests, organise your paddle, put on your PFD and get the rest of your gear ready. By the time you’re done, the kayak is often ready too. It’s another small barrier removed between arriving and getting on the water.
Some electric pumps plug directly into the 12V outlet in your car or RV. They work well, but because they rely on an external power supply, you’re generally setting the kayak up reasonably close to the vehicle. Most have a long power cable, so this isn’t usually a problem. You inflate and prepare the kayak beside the car or RV, then carry the fully inflated kayak down to the water.
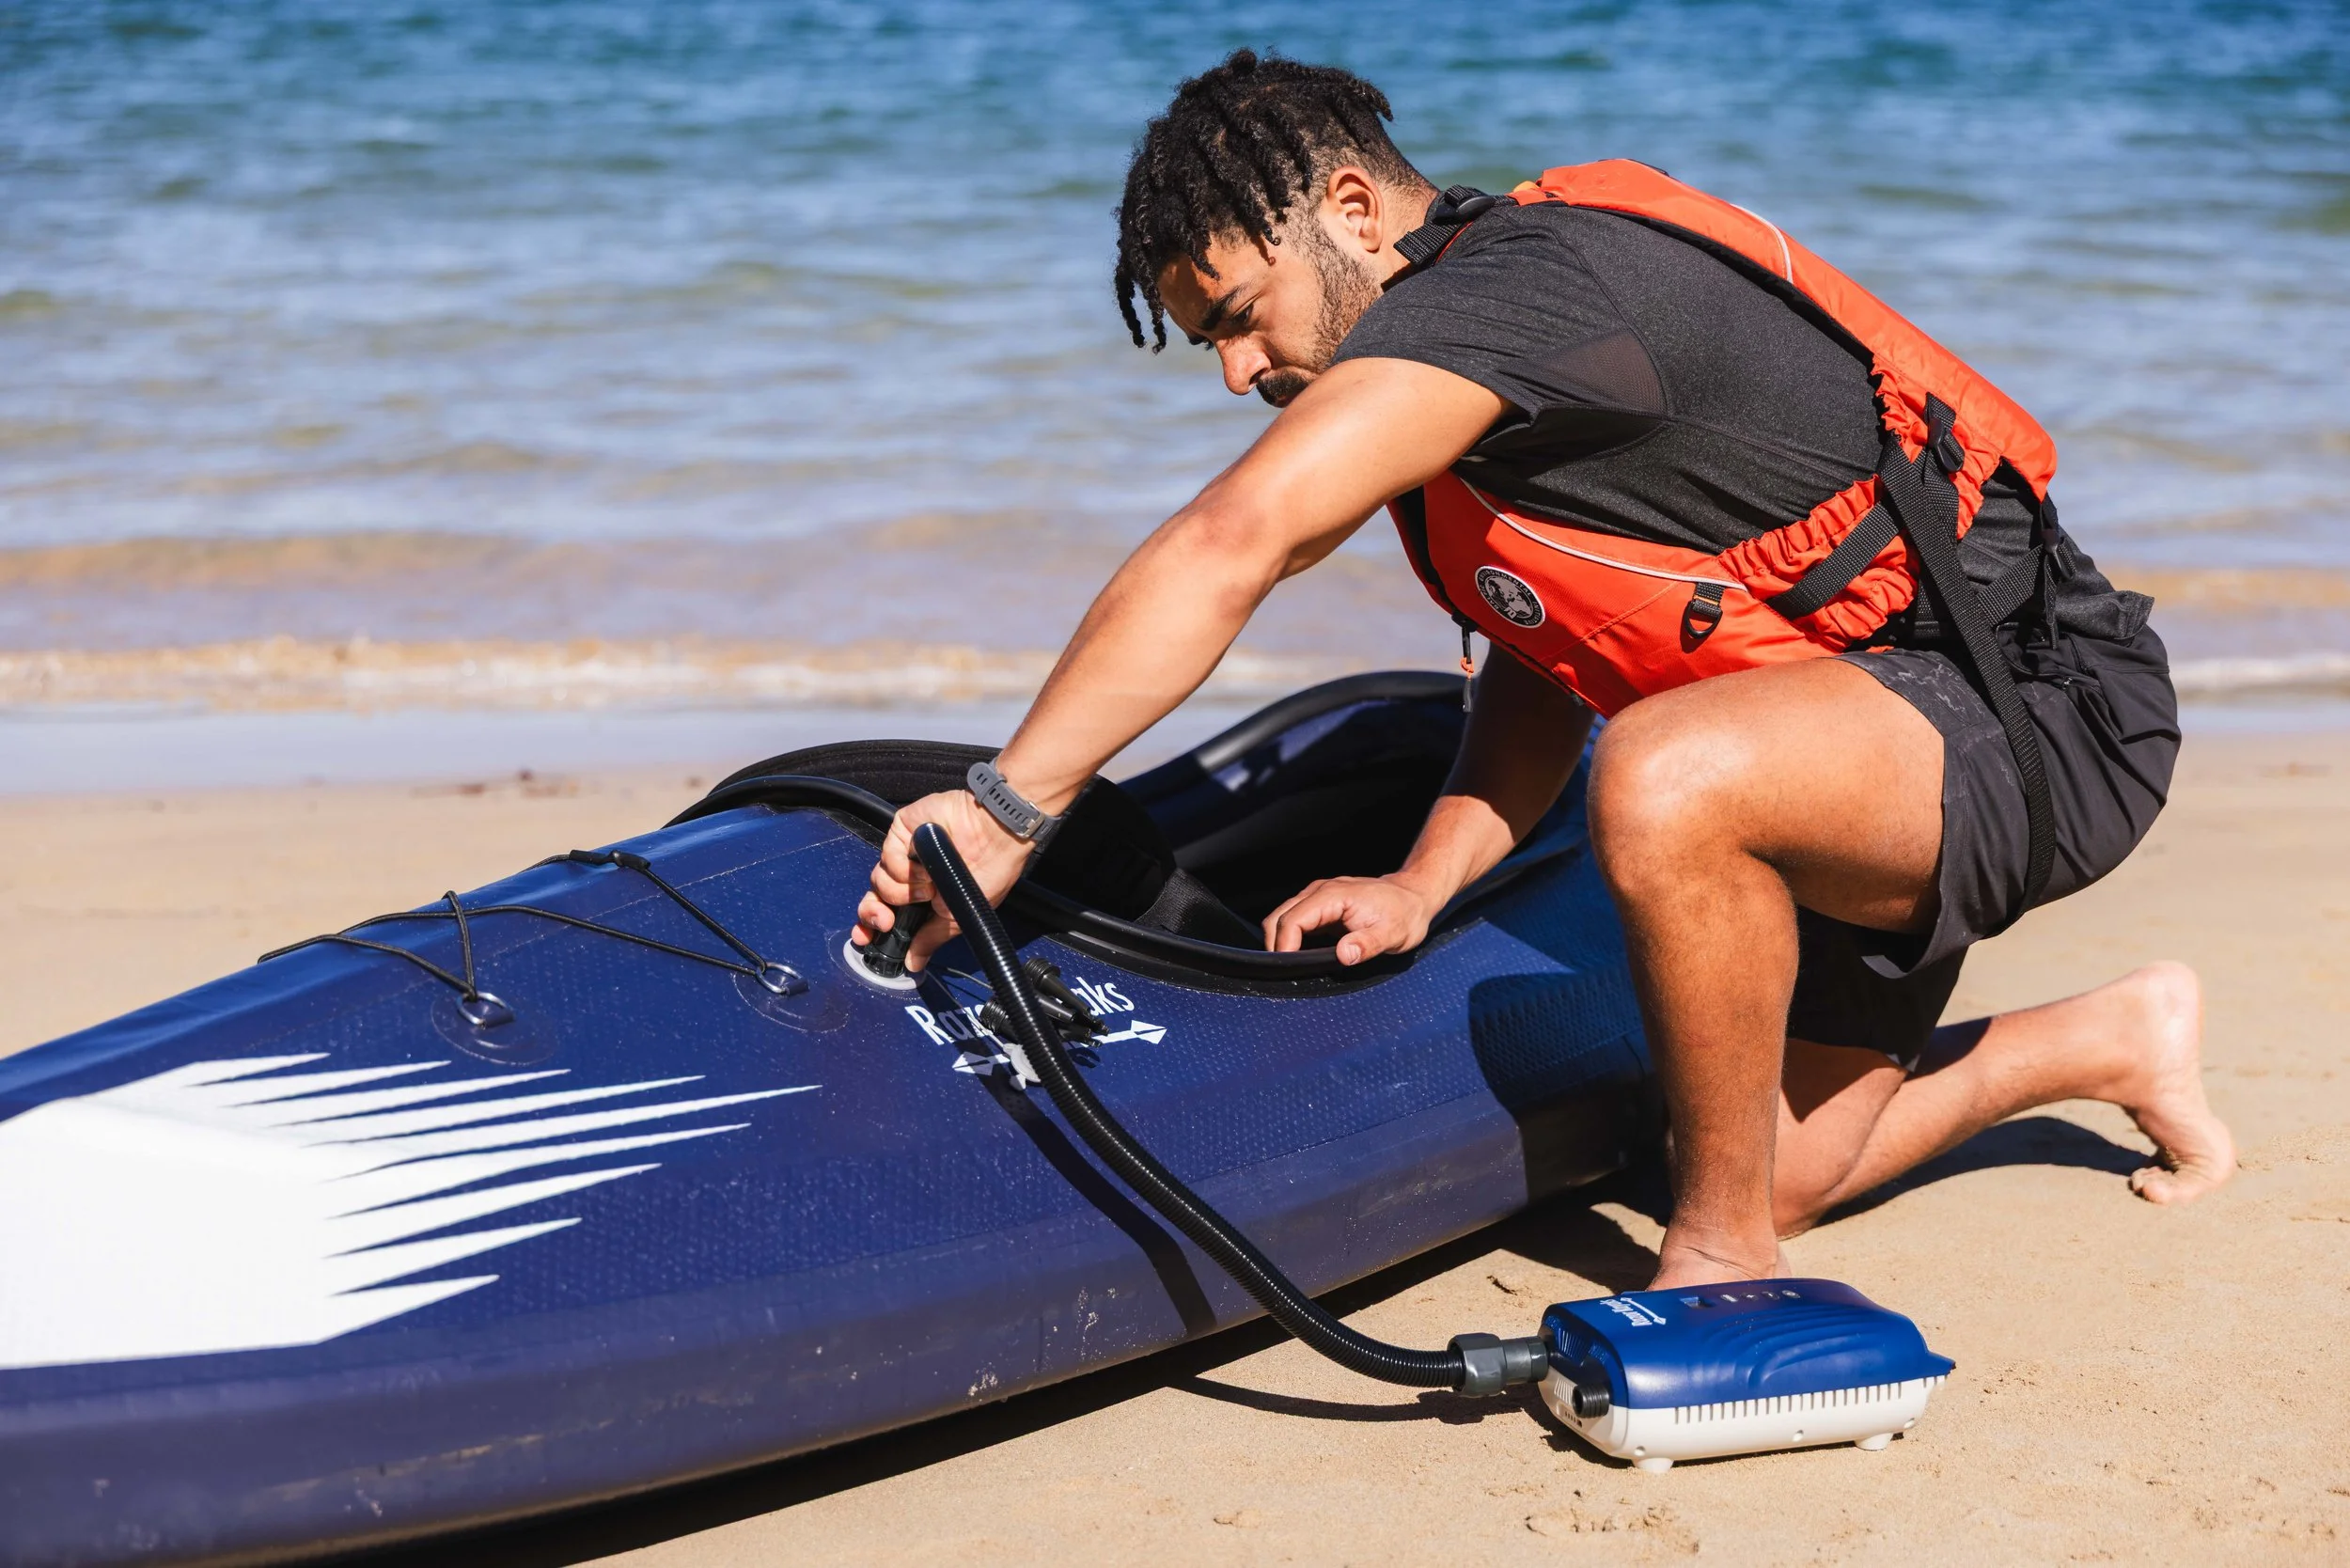
The most versatile option is a rechargeable electric pump. Because the battery is built into the pump, you can take it almost anywhere and inflate the kayak right at the launch point. You can even take it with you on an overnight trip if you need to inflate the kayak again along the way. For many paddlers, being able to set up right beside the water is about as convenient as it gets.
A good rechargeable pump will generally provide enough battery capacity for several complete kayak inflations before it needs charging. Around four to seven inflations is fairly typical, although this will vary depending on the size of the chambers, whether you’re inflating a solo or tandem kayak, the pressure required and the conditions on the day.
Another useful feature is reverse airflow. Instead of simply opening the valves and waiting for the kayak to deflate, the pump can draw the remaining air out of the chambers. This helps the kayak fold down more compactly and makes getting it neatly back into the carry bag much easier.
Just like a good manual pump, the real advantage of an electric pump is that it makes the whole process easier. You arrive, connect the pump, get the rest of your gear organized and let it do the work. The less effort there is between deciding to go paddling and actually getting on the water, the more likely you are to use your kayak regularly.
Compressor Attachments
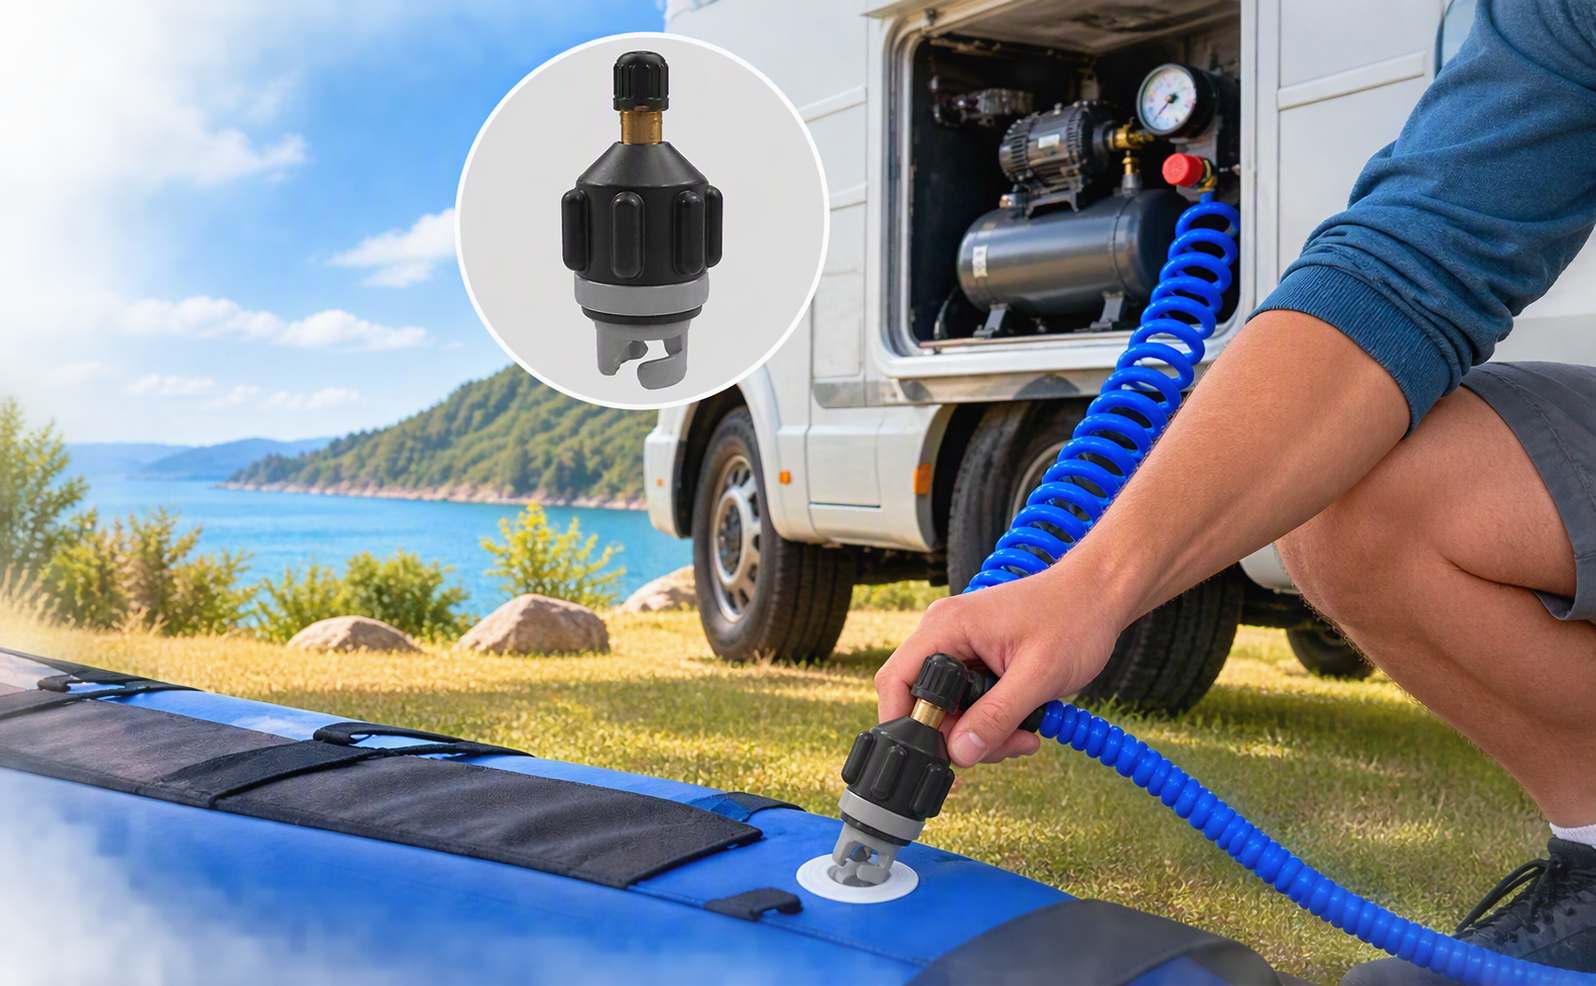
Compressor attachments allow you to connect an air compressor directly to your kayak valve for inflation. They are particularly useful if you already have access to a compressor.
Performance will depend on the capacity of your compressor. Larger workshop-style compressors can inflate a kayak efficiently, while smaller portable compressors will also work, but may need to work hard to supply the large volume of air required.
This can be a practical option if your car, camper or caravan already has an onboard compressor. Like a 12V electric pump, however, you are generally restricted to inflating the kayak within close proximity to your air source.
Make Sure the Pump Fits Your Valve
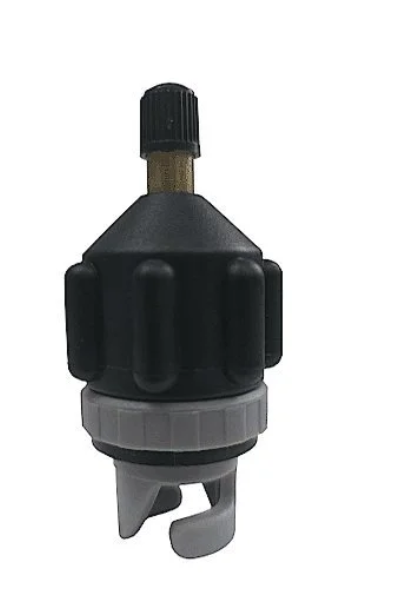
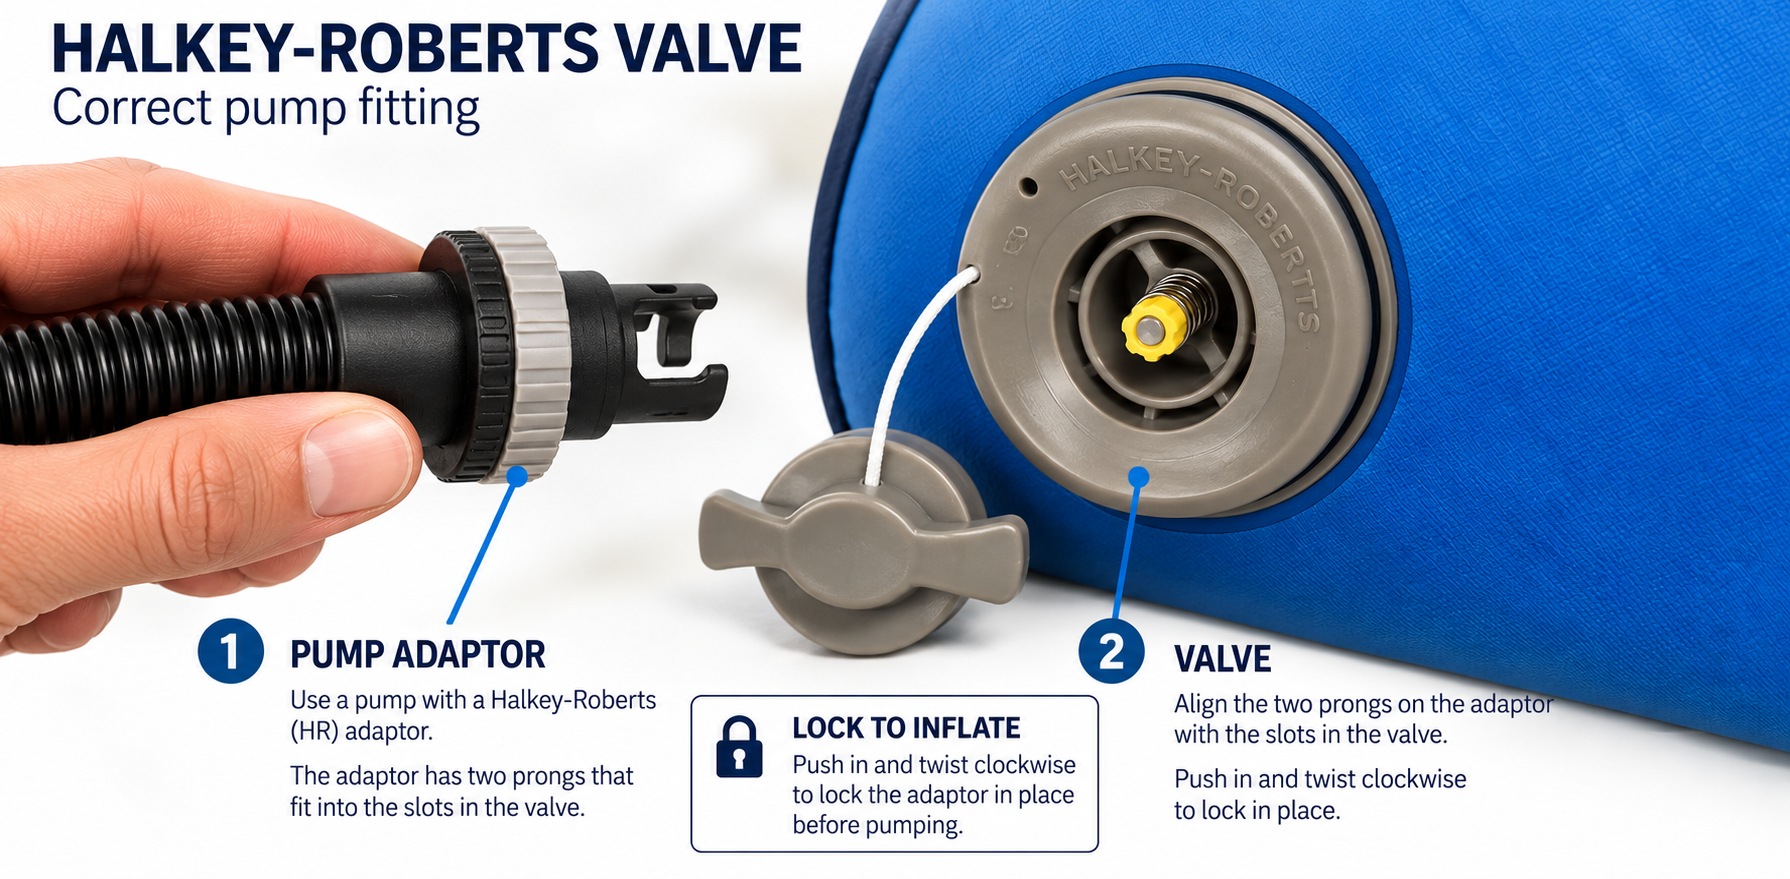
One final thing to check is the connection between the pump and your kayak. Inflatable kayaks use a number of different valve styles, and the pump needs the correct fitting or adaptor to create a good seal.
A fitting that doesn’t match properly can leak air while you’re pumping, make inflation slower and, in some cases, make it difficult to reach the correct pressure. Before buying a pump, check which valve your kayak uses and make sure the correct adaptor is supplied or readily available.
It is also worth checking whether all of the chambers on your kayak use the same valve. Some inflatable kayaks use two or even three different valve types across the side chambers, floor and other inflatable sections. If that is the case, do not assume one fitting will work for the whole kayak.
Razor Kayaks use the same valve type across all chambers, which makes pump compatibility much simpler. If you are using a different brand, it is a good idea to check every chamber individually before buying a pump, so you know you have the right fittings for the entire kayak.
Using a Pump Correctly
Before attaching the pump, make sure the kayak valve is set to the closed position. Attach the pump securely, then inflate the chamber to the recommended pressure.
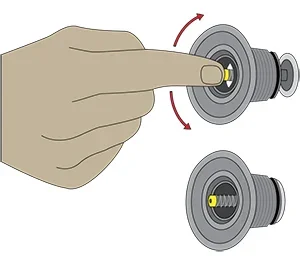
On most Halkey-Roberts-style valves, the centre pin should be in the raised or extended position for inflation. In this position, the valve acts as a one-way valve: air can still be pumped into the chamber, but when the pump hose is removed the valve closes and prevents the air from rushing back out.
If the centre pin is pushed down and locked in place, the valve is open. You can still pump air in, but as soon as the hose is removed, air can escape freely from the chamber.
Most problems occur when the valve is left open before the pump is attached. In this position, air can escape rapidly as soon as the pump hose is removed.
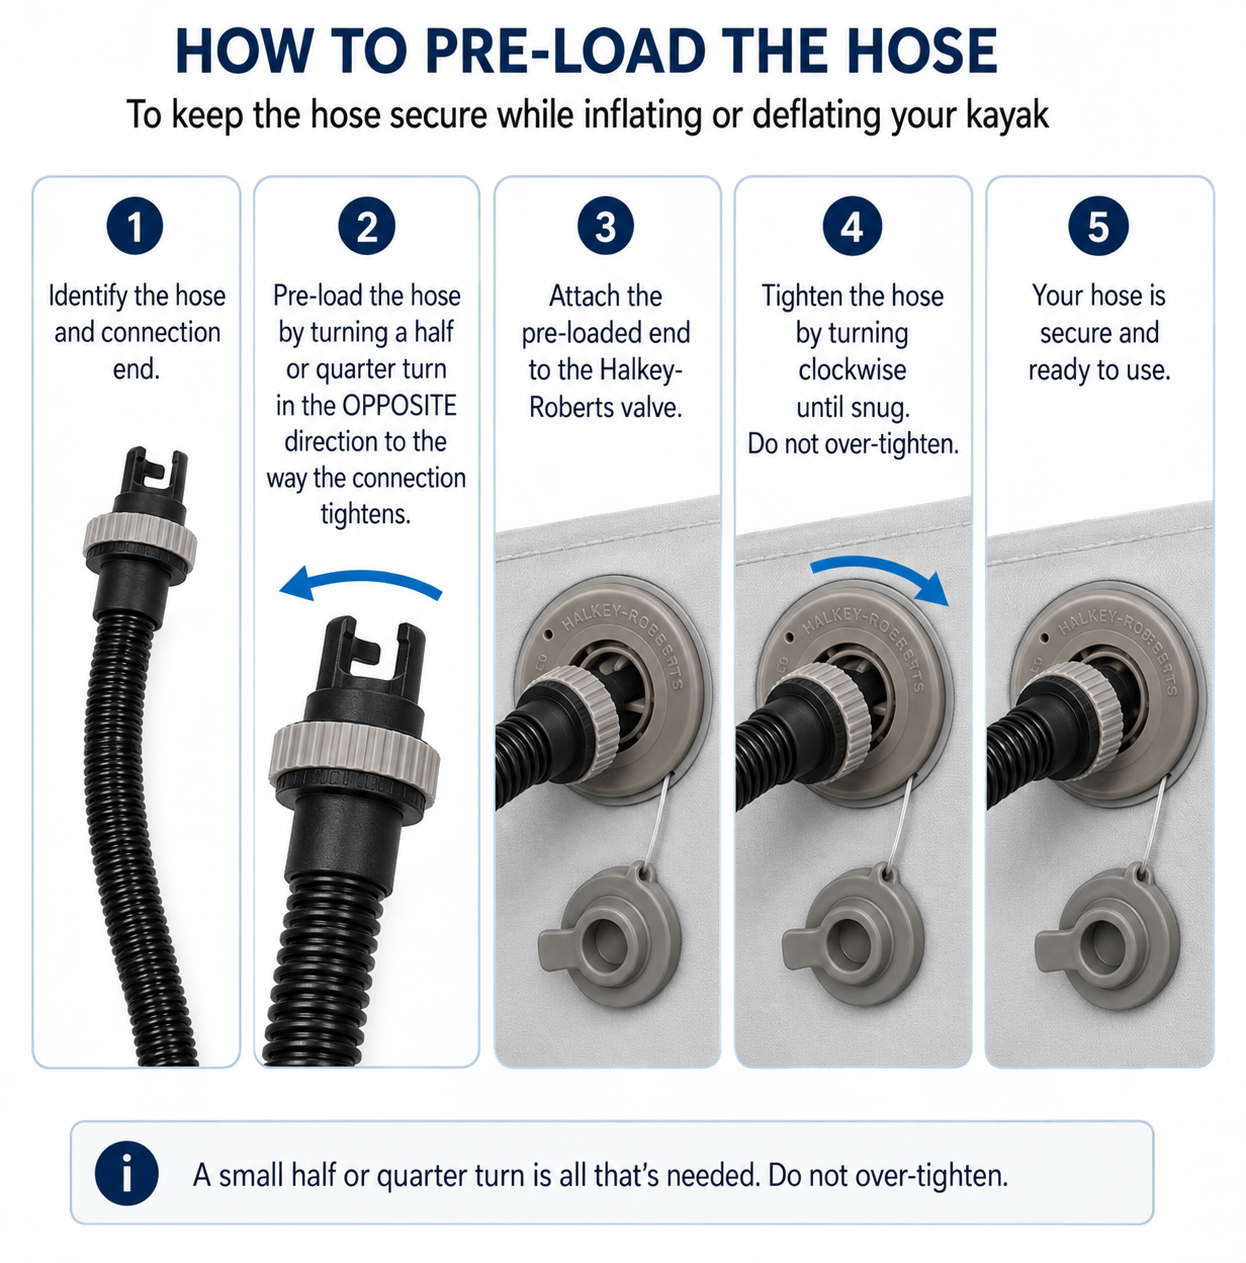
Another common issue is the pump hose working itself loose during inflation. Quality pump hoses are often quite stiff, so twisting the hose onto the valve can store tension in the hose. As the hose tries to return to its natural position, this tension can gradually unscrew the fitting from the valve.
To prevent this, pre-twist the hose slightly in the opposite direction before attaching it to the valve. When you then twist the fitting onto the valve, the tension in the hose will work to keep the connection tight rather than loosen it.
Pump Maintenance
Pumps are a simple tool. Basic care and maintenance can help them last a long time.
The enemy of a pump is dirt grime and sand. If it gets into the moving parts the plunger, piston head and seals can be compromised. By preventing sand and dirt in particular, getting into the movinkg parts, this will go a long way to preventing damage.
If a pump gets too hot, like leaving it in a hot car, this can make the lubricants around the moving parts, in particular the piston head seal melt an dry out. If this happens the pump will become very stiff to operate and air can escape around the seals making it very inefficient or nonoperational.
If this happens it is a simple fix. You just need to lubricate the piston lightly with grease or oil.
Impact from incidents like accidentally stemipng onto it during set up or poor storage where something falls on it can bend the plunder or dent the piston body. The tolerance of a pump is very tight. If this happened to your pump it woul potentially destroy it.
In short, keeping it, safe transportation and thoughtful storage will make your pump last years.
PSI vs BAR vs kpa conversion
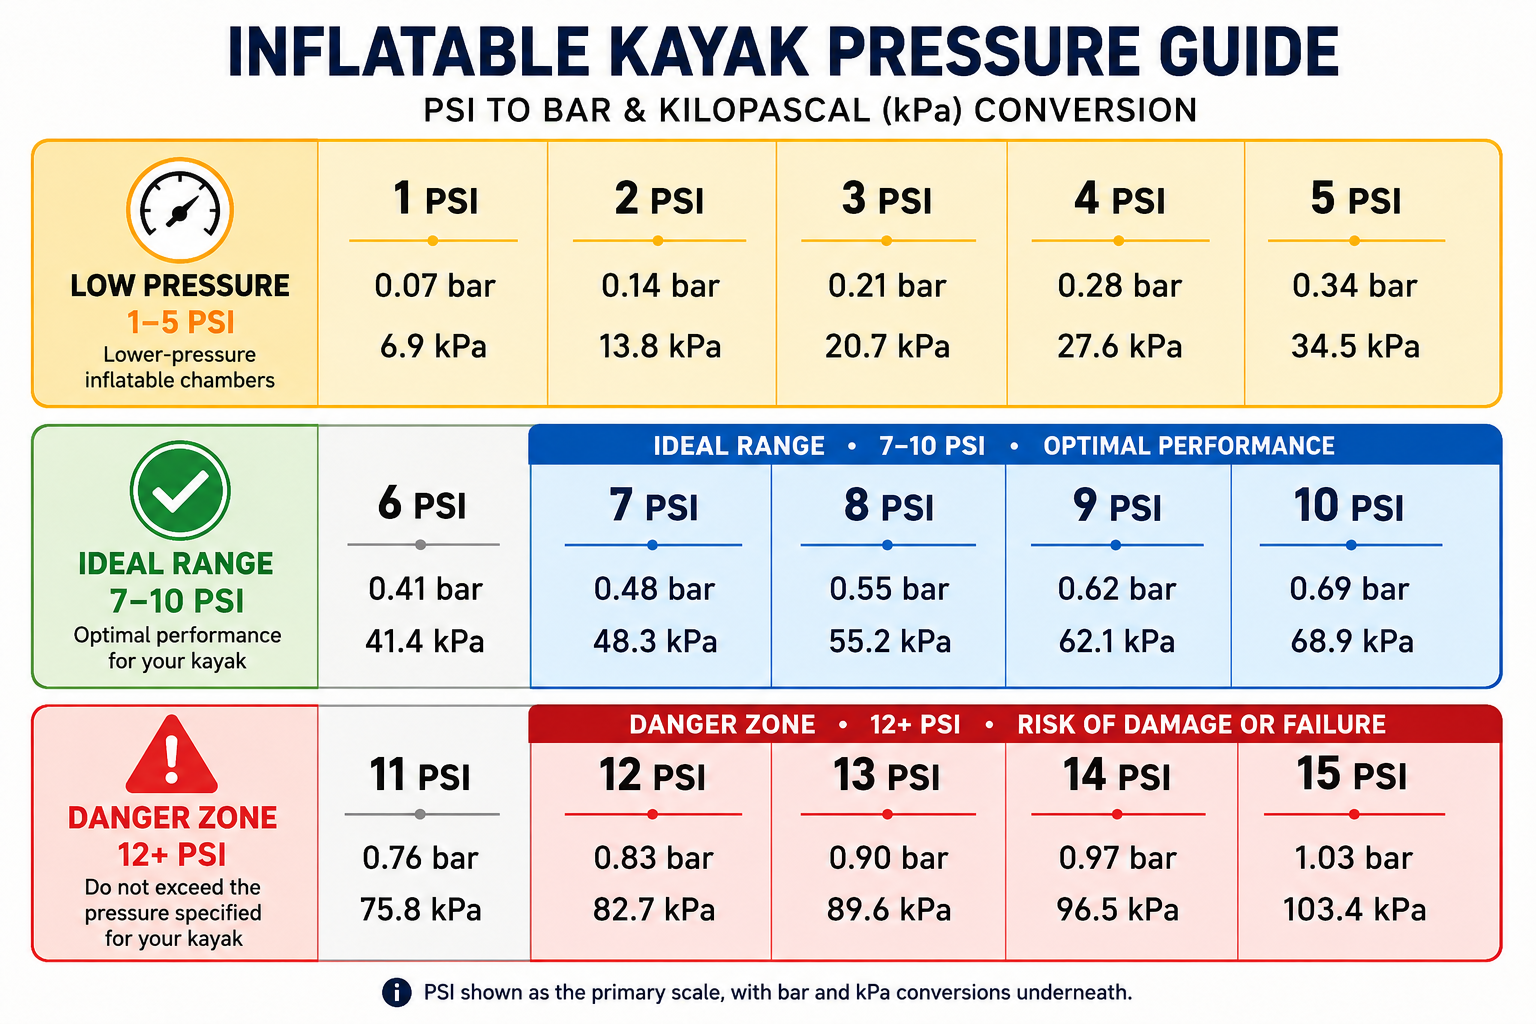
PSI kpa and bar are essentially measuring the same thing on a different scale. Many european countries use bar mesurement. USA uses PSI while many other nations use kpa or a combination.
None of the systems are right or wrong, its just what your used to. Below is a table showing the conversion of all 3 measurement scales.
Temperature, Altitude and Inflation Pressure
Once an inflatable kayak has been inflated, the pressure inside the chambers can still change. Two of the biggest influences are temperature and altitude. This is particularly important with higher-pressure inflatable kayaks, where getting the pressure right affects both performance and the amount of stress placed on the kayak.
TTemperature
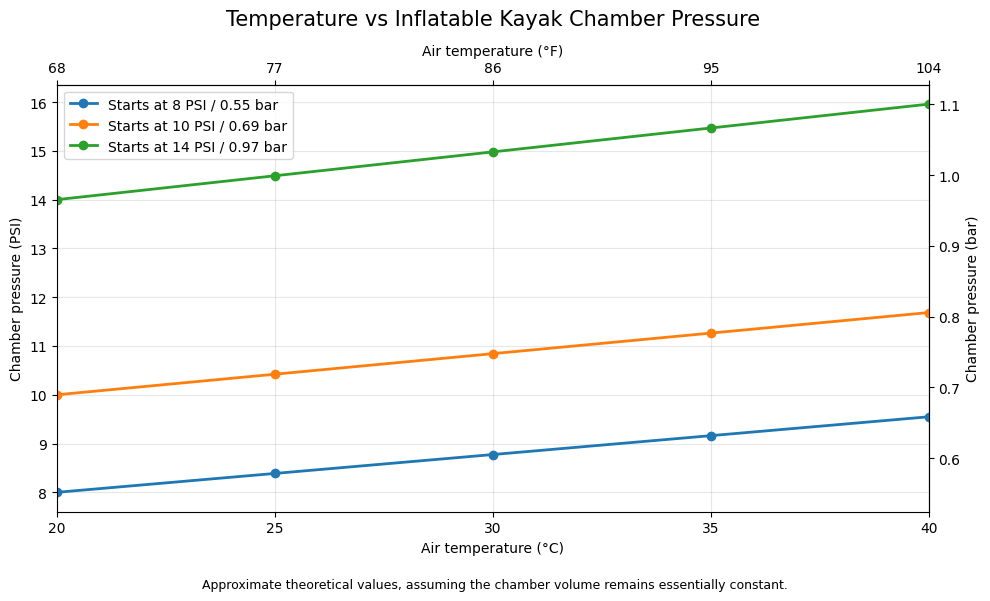
As the air inside a kayak gets warmer, the chamber pressure increases. A kayak inflated to 10 PSI / 0.69 bar at 20°C / 68°F could rise to around 11.3 PSI / 0.78 bar at 35°C / 95°F, and around 11.7 PSI / 0.81 bar at 40°C / 104°F. This is why a kayak inflated correctly on a cool morning can become noticeably firmer after sitting in the sun.
The starting pressure matters too. If a 10 PSI chamber was mistakenly inflated to 14 PSI / 0.97 bar, it is already 40% overinflated. At 35°C / 95°F that could rise to around 15.5 PSI / 1.07 bar, and at 40°C / 104°F to almost 16 PSI / 1.10 bar.
Many manufacturers build some tolerance into their inflatable products to account for normal pressure increases as the kayak warms up, so this is generally something to be aware of rather than something to worry about every time the temperature changes. However, if the kayak has been sitting in strong sun or feels noticeably firmer than when you inflated it, it is a good idea to check the pressure with a gauge and release a little air if necessary to bring it back to the recommended pressure.
Altitude
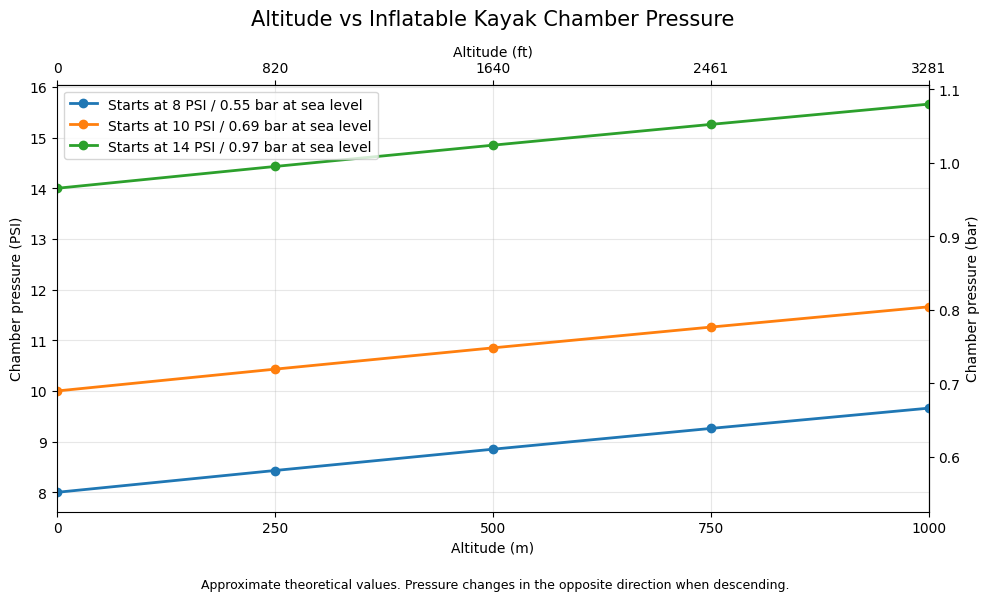
Altitude has a similar effect. As you travel higher, the atmospheric pressure outside the kayak decreases, effectively increasing the pressure inside the chamber relative to the surrounding air. A kayak inflated to 10 PSI / 0.69 bar at sea level could be around 10.9 PSI / 0.75 bar at 500 m / 1,640 ft, and around 11.7 PSI / 0.80 bar at 1,000 m / 3,281 ft. It is the same basic reason a sealed packet of chips expands as an aeroplane climbs.
The opposite happens when you travel back down. A kayak inflated at higher altitude can lose pressure as the outside atmospheric pressure increases. So if you are transporting a fully inflated kayak through significant changes in elevation, it is worth checking the pressure again when you arrive.
Why a Quality Pump and Accurate Inflation Matters
This is why a good pump with an accurate pressure gauge is so important. If a 10 PSI kayak is accidentally inflated to 14 PSI, it is already 40% over its recommended pressure. Add a temperature increase to 35°C / 95°F and it could reach around 15.5 PSI, more than 50% above the pressure it was designed for. That can place significantly more stress on the chamber material, seams, valves and construction.
The simple rule is to inflate to the manufacturer’s recommended pressure, use an accurate gauge, and remember that temperature and altitude can continue to change the pressure after you put the pump away.
For more information, visit our complete guide to inflatable kayaks. You can also explore our kayak range or browse our pumps and accessories.